Blended Storage Box With Eucalyptus Transfer DIY

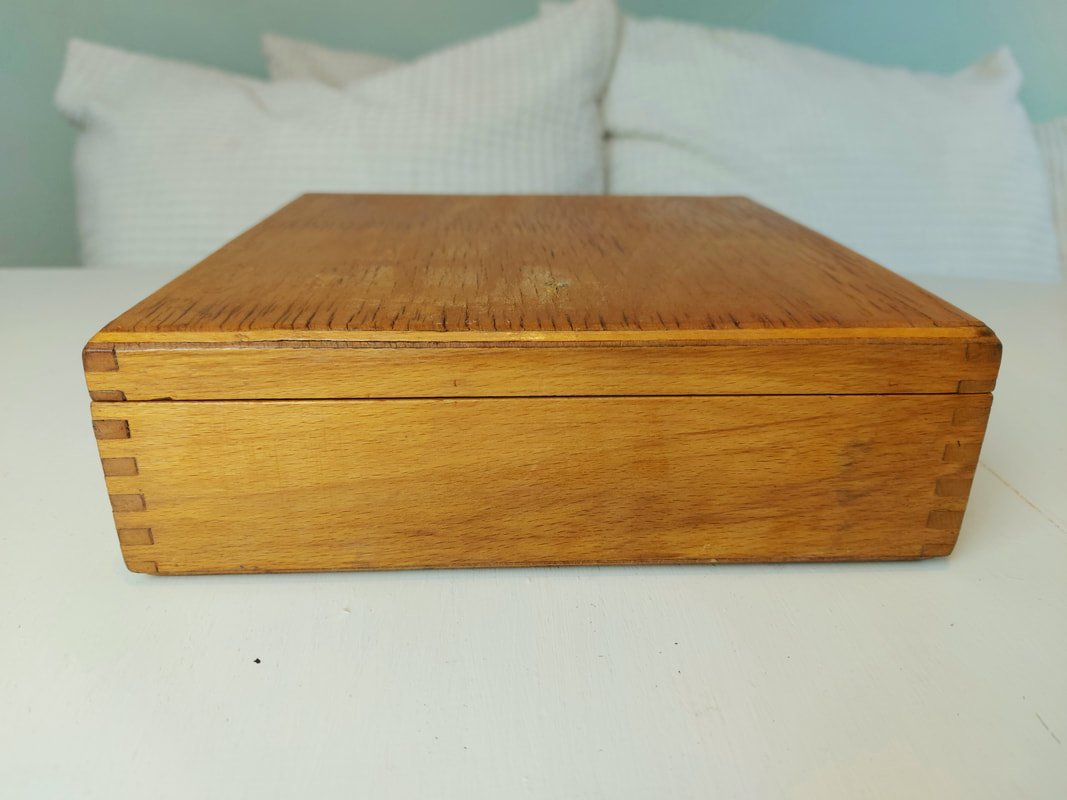
Decorative boxes are a great storage option to hide clutter and a fun design element to add into your space. I found this wood storage box at my local thrift shop for $1.99!
This was the perfect project to use Dixie Belle's new Eucalyptus transfer from the Belles and Whistles line. Small decor pieces are a fabulous way to have some fun and get creative. Here are the steps and materials I used so you can try this out on your next project!

Materials
Dixie Belle Chalk Mineral paint in Antebellum, Palmetto, Farmhouse Green and Cotton
Best Dang brush, Belle brush and 3 other Dixie Belle brushes
Step One
First, prep your piece to get started on the right foot. Clean with White Lightning to remove any oil and residue. Use a sanding pad and give it a quick scuff sand and then wipe off with a damp cloth.
Step Two
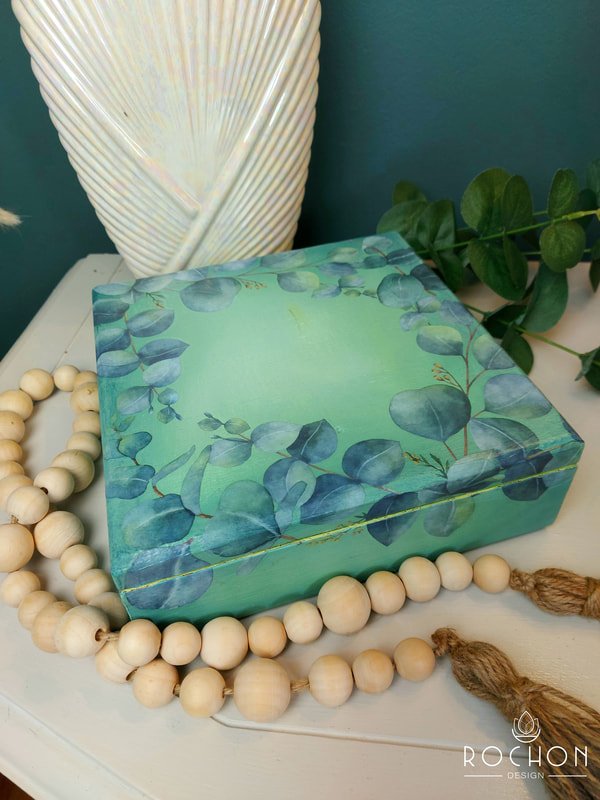
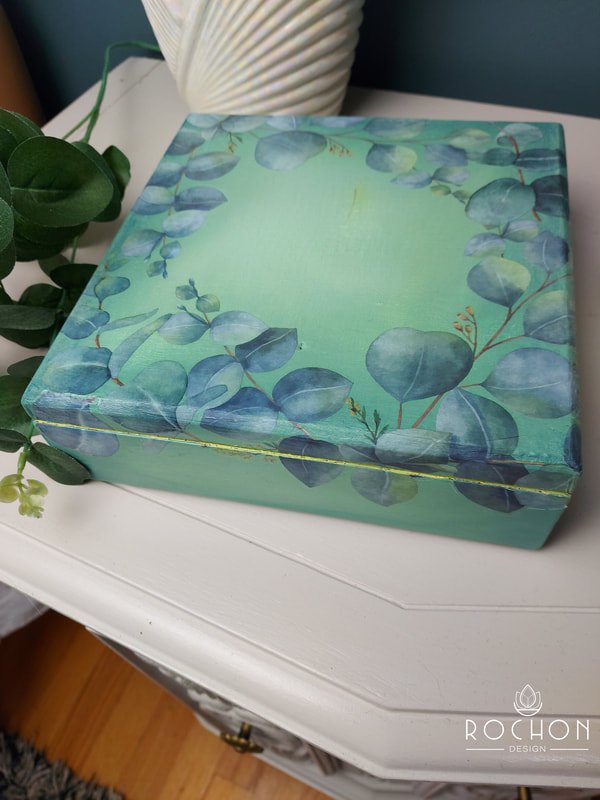
To give the box an even and bright surface to start with, paint the box with Cotton and let dry.
Step Three
Then build a base layer for your blended paint finish and paint the edge of the top of the box and edges in Antebellum Blue.

Next use a clean brush and apply Palmetto inside Antebellum Blue.

Then, using a clean brush apply Farmhouse Green in the center of the box.

Finally, with a clean brush add Cotton to the center of the very center of the box.
Step Four
Use the Continuous Spray Mister to apply a light mist of water. Next use the Best Dang Wax brush to begin blending the paint in a circular motion in the center moving to outer edges. Continue moving the paint out to the edges of the box. Let the paint dry.


Step Five
Follow step 3, adding the same colours to the surface. Use the Continuous Mister to blend. Make sure to blend out any harsh lines. Generally the key to blending is having lighter colours in the center that gradually get darker as they move toward the edge.

Pro tip- Make sure to stand back and take a look at the whole project throughout this process. This will help you see where to blend or add more paint.
Continue adding paint, applying colours until you are happy with the result.

Step Six
Cut out the transfer and decide on the placement.
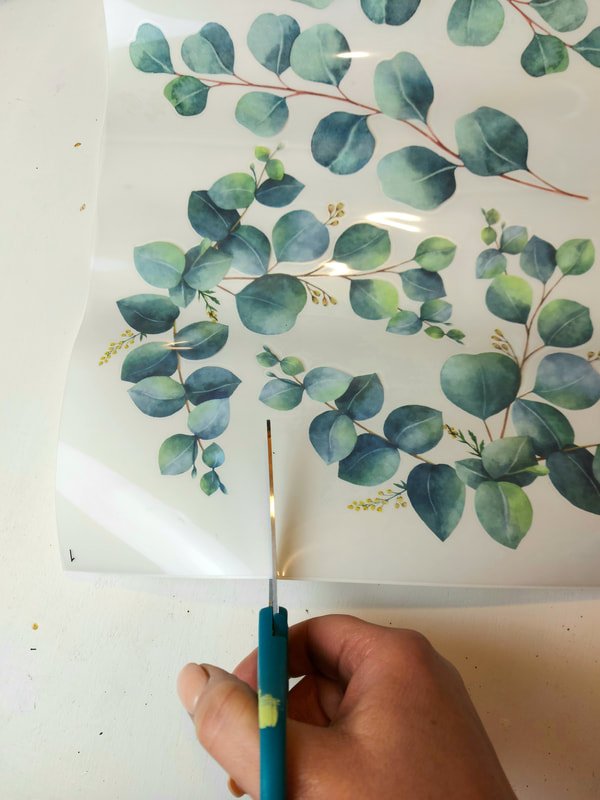
Remove the white backing from the transfer and place the adhesive side onto the surface.

Use the applicator to gently rub and burnish the transfer onto the surface.

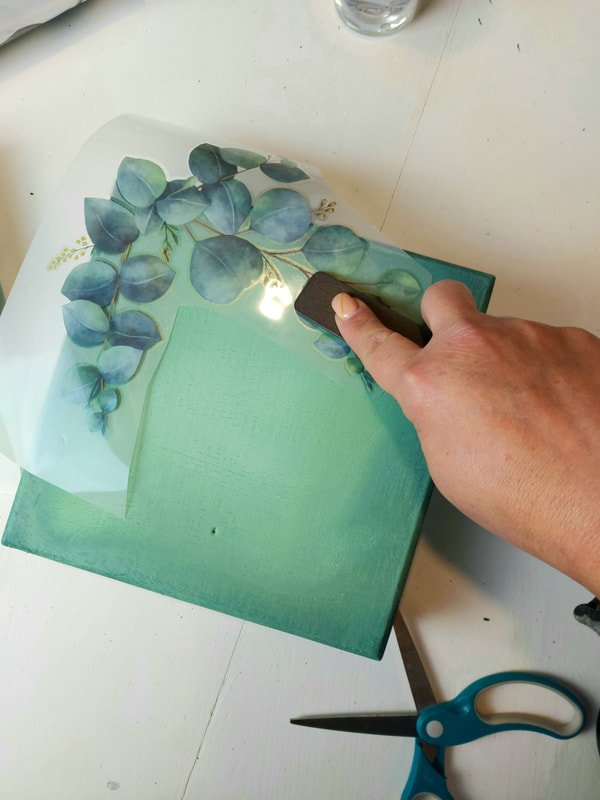
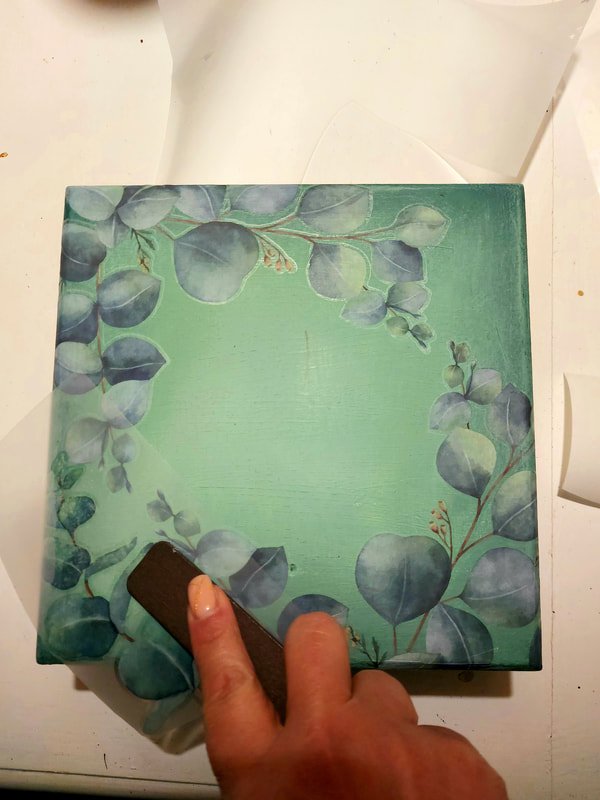
Once the transfer has adhered, remove the film leaving the image on the surface. Continue until all of the transfers are applied to the surface.

Step Seven
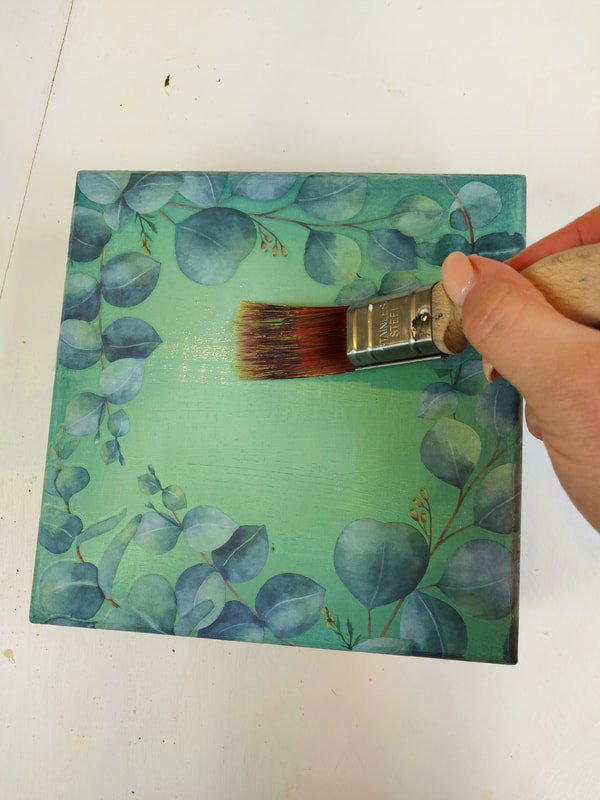
Use a synthetic brush to apply a thin coat of gloss Clear Coat over the whole surface. After approximately 30 minutes, apply another coat and let it dry. This will protect the surface and transfer.
Small decor items can have a big impact. Try this blended technique and the eucalyptus transfer on your next DIY project! Happy Painting!